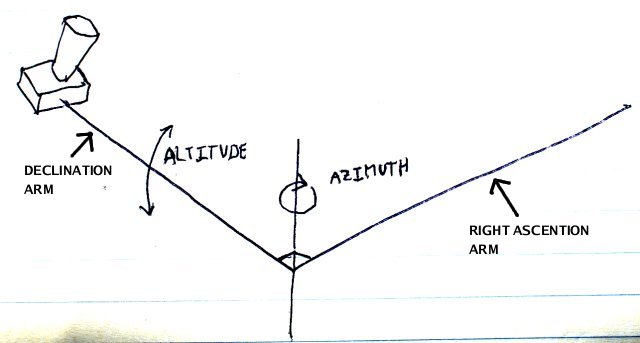
The 3 parameters which must be aligned are altitude, azimuth, and tracking speed. They are all relative to the declination arm. Everything else hangs off the declination arm.
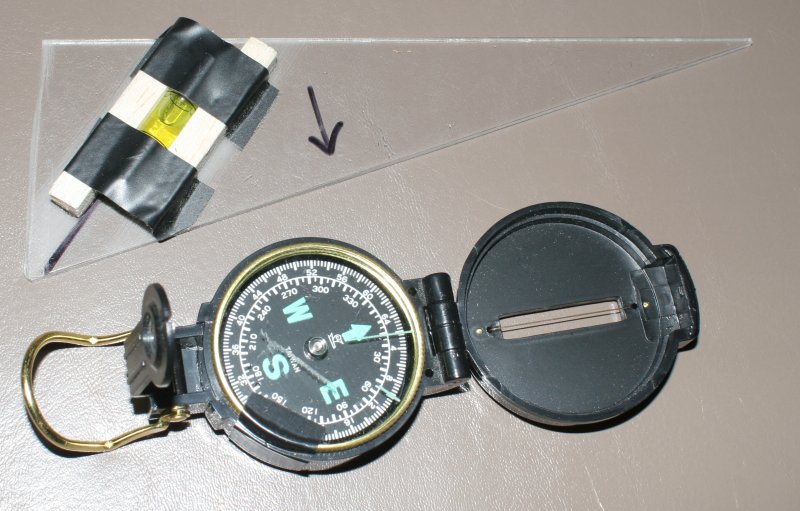
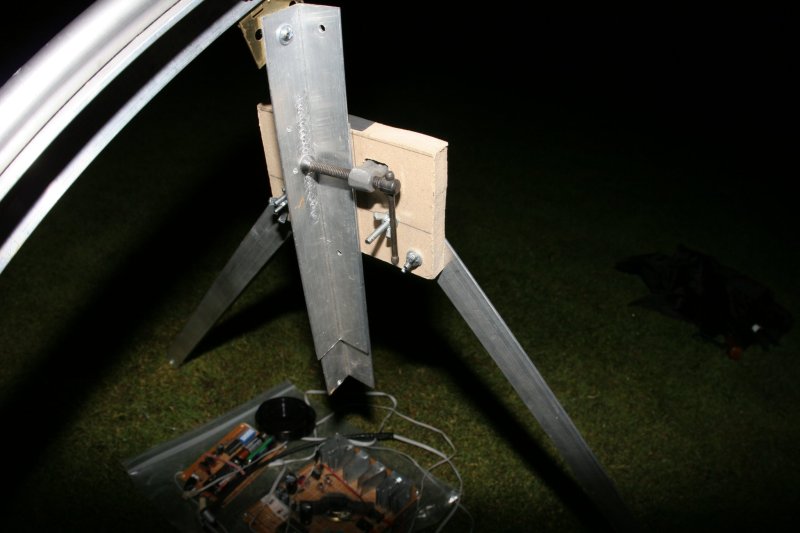
When the trapezoid is first assembled, we use a lensatic compass and angle tool to roughly set the azimuth and altitude of the declination arm. When resting on the declination arm, the angle tool is calibrated to show level when it's 37°. The lensatic compass needs to show 60 mils. This is the axis of the Earth's rotation relative to the dumpy apartment. Then the right ascention support is aligned to be exactly vertical and span no fishing line when the right ascention arm is completely deflected.

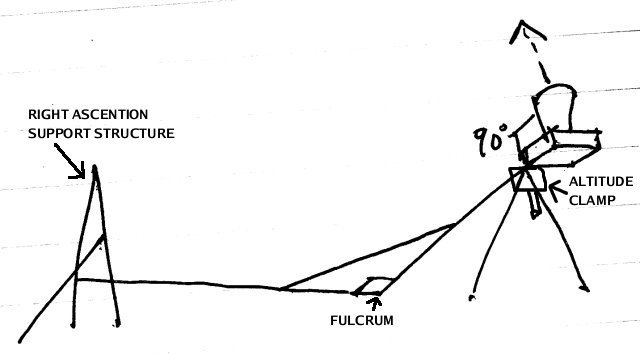
The fulcrum is always pinned down to simplify the alignment.
Next comes azimuth adjustment. Refining the azimuth requires pointing the camera straight up and at a star on the equator.
Take a 60 sec, ISO 400, F2.8 exposure. Advance the right ascention at full speed for the first 15 seconds and leave stationary for the next 45 seconds. An unaligned trapezoidian produces V trails while an aligned trapezoidian produces single lines. The faint trail was created by the 15 sec movement. The bright trail was created by the 45 second movement.

Rotate the azimuth to get the star trails parallel. In the previous image, the trapezoid had to be rotated clockwise relative to the direction of the lens to get the bright trails to rotate counterclockwise.
Changing azimuth involves moving the right ascention support out of the way, moving the camera a few inches left or right around the fulcrum, and realigning the right ascention support and realigning the declination. It's not the funnest procedure but it beats arguing with tile repair managers at NASA. Normally a few pixels of azimuth error requires 2" of camera movement.
Next comes altitude adjustment. Refining the altitude requires pointing the camera east and at a star on the equator.
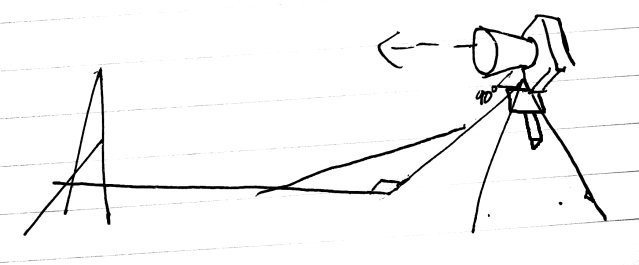
Use the same exposure technique from the azimuth alignment here. Rotate the altitude to get the star trails parallel.

The altitude mount was very hard to design but we think we have something which is pretty stable. Changing altitude requires loosening the altitude clamp, sliding the camera up and down, and tightening it. Then adjust the right ascention support to allow movement in the new altitude. A few pixels of altitude error requires 1/4" of camera movement.
Now locate any subject for the tracking adjustment. Take 2 * 30 second exposures with tracking. Adjust the tracking speed until the two exposures are as close as possible, bearing in mind the mirror flapping causes additional shift between exposures. Then align with 2 * 120 second exposures to get the finest adjustment.
Rewind the trapezoid and test tracking speed again. It seems to be
unstable.

(C) 1997-2024 Starving, flat broke, usually unemployed Programmers
Hosted all these years by Sourceforge